Student: Add A Student - Manual Entry
When you set up your students in Charms, be very thorough with their information. The more data you fill in, the easier it is to track and manage your students.
This article walks you through setting up one student at a time. If you want to add multiple students, see Import students. If you would like to enable the self- register option, see Self Registration.
** TIP**
When a new student is created in Charms, a tokenized URL is emailed to the student at the email attached to their student detail. This will allow the student to log in to Charms. The email will look like this.

How to Add a New Student
- On the Main Sections menu, click Students, and then click Add New.
For ID, type the student's ID. If you want, Charms can assign a random ID, just click "Suggest"

Fill in the First, Middle, Last Name, and Email Address, and then click "Add Student"

In the Recently Added Students section, locate your student and click the blue pencil icon to add additional student details.


- If you have a student photo, in the Photo section, click Browse, select the photo, click Open, and then click Upload Now.
- Fill in the Student Contact Info section.
- Fill in the Custom Fields section.
- If you are using the Student Award feature, click in the Point System field to access this feature and give the student points.
- For Record Status, select Active.
- Add your student's parent or guardian information to the their file.
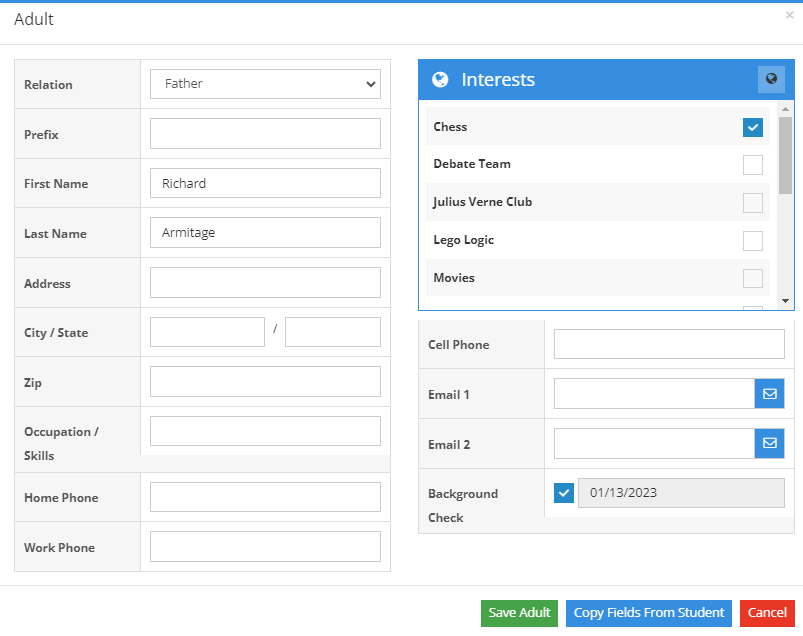
In the Adults section, click +Add

- For Relation, select the relationship type.
- Fill in as many of the other fields as you can, phone numbers and email addresses are especially important.
To include this adult in interest groups, select the group. Also, you can create a global interest group by clicking the globe in the Interest Group heading

- You can click the "Copy Fields From Student" to automatically fill in some fields like address.
When finished, click "Save Adult"
- For Groups, select each group the student is a member of. Click the star next to the group name to make that group their primary group. There can be one primary group per student.
- Fill in the Personal Info section.
- Please note, when entering the student birthday, make sure to enter as MM/DD/YYYY format.
- In the the Part List section, select options for each part the student is in. If unsure, leave as Not Assigned.
- If applicable, fill in the Resources section.
- If applicable, fill in the Personal Instruments section.
When finished, at the top right, click "Save"


Familiarize yourself with the additional tabs at the top (Class Schedule, Adult Contact Log, Award/Progress Log, Student Files). As the school year progresses, you can add information to these tabs.