Create a calendar event
The Charms calendar provides a quick view of all your events on a monthly basis. It is a great way to get event information out to students, parents, and the general public. If your Charms account is configured for a district-wide management portal, you will also have the option of displaying events on the district calendar.
The Charms calendar is more than just a view of your events, you can create events on the calendar and then using event controls, you can track event attendance, ask for volunteers, request RSVPs, and define who can see the events.
- On the Main Sections menu, click Calendar.
- Click a date on the calendar.
- Fill in the event information on the Event Details tab.
- Type your Event Name.
- For Event Type, select an option from the list.
- For Date, enter the event date using the mm/dd/yyyy format.
- The event duration defaults to All Day. If your event has a start and end time, clear the All Day selection and enter the Start and End times. Be sure to use the leading zero for morning hours.
- For Location, enter the location of the event.
For Description, provide information about the event. You have multiple rich text formatting options for the description. You can add pictures and links to websites too. This description is displayed when a calendar viewer opens the event.

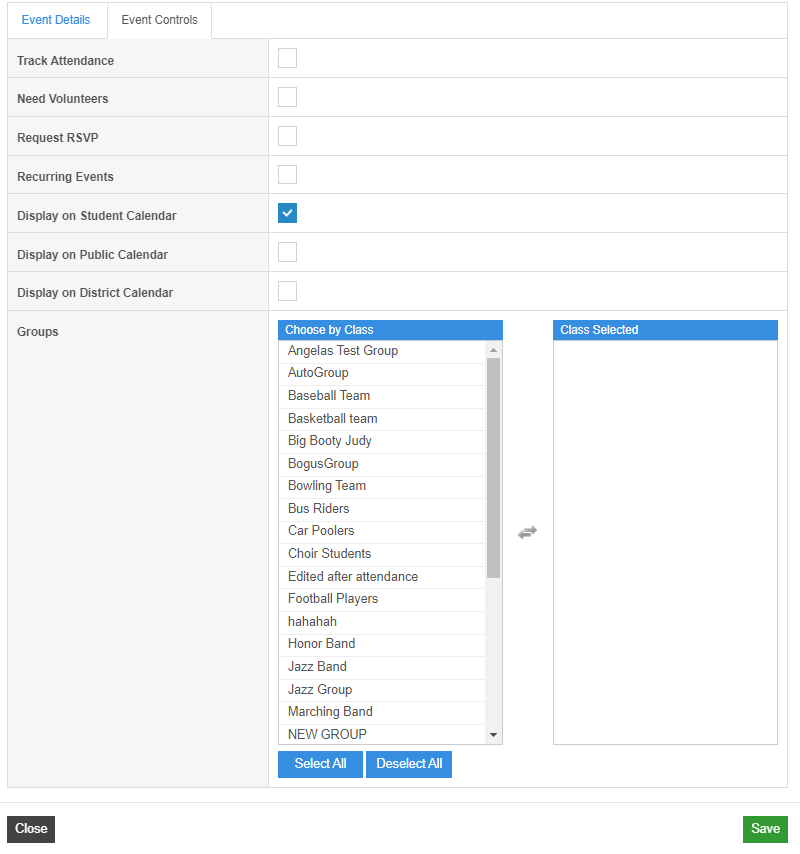
- Click the Event Controls tab and select the applicable options.
- Track Attendance: If you plan to take attendance for the event, select this option. Then, under Calendar > Attendance, you can select the event and mark the students attendance appropriately.
- Need Volunteers: If you want volunteers for the event, select this option. A volunteer icon is displayed next to the event and calendar viewers can click the icon and sign up for the volunteer areas. Note that you need to set up volunteer areas before people can sign up.
- Request RSVP: Select this option if you want to track who is coming to the event. To see the list of RSVPs, access the public calendar and click the RSVP icon on the event.
- Display on Student Calendar: If this event is something you want students, parents, and other Charms users to be aware of, select this option. It is displayed on the calendar in the Parents/Students/Members portal.
- Display on the Public Calendar: If this event is something you want the general public to be aware of, select this option. This is a good option if you are inviting the students' extended families, and other people that cannot access the Parents/Students/Members portal.
- Display on District Calendar: Select this option for events you want publicized at the district level. This is only available for Charms accounts with a district-wide management portal and purchase account.
- Group: If the event applies only to certain groups, select those groups. Click the group to add or remove it from the columns. Students assigned to those groups will see the event on the calendar. If the event applies to all, do not select any groups.
Click the green "Save" button


The event now displays on your Charms calendar, and on any additional calendars you selected on the Event Controls tab, as well as in the event list report (Calendar > Event List).
Need to edit an event? Click the event, make your edits, and then click the green "Save" button

Need to delete an event? Click the event and then click "Delete"


